


Tired of logging on to Azure Data Factory every day and checking the status of your pipeline(s)? What if you forget to look at the pipeline monitor for a week and the pipeline has failed? Have you been working on outdated/incorrect data that a week? Don’t worry, the solution below will make sure you can sleep well.
In this blog, we will develop an automatic email that alerts you when a pipeline fails. First, we will develop a Logic App and then we will configure it in Azure Data Factory. The reason why we use a Logic App is that Azure Data Factory does not allow us to send emails. It is possible to activate standard alerts (emails) in ADF but in my opinion, these do not create any clarity, what a custom email does.
Watch the How To-video:
Let’s get started!
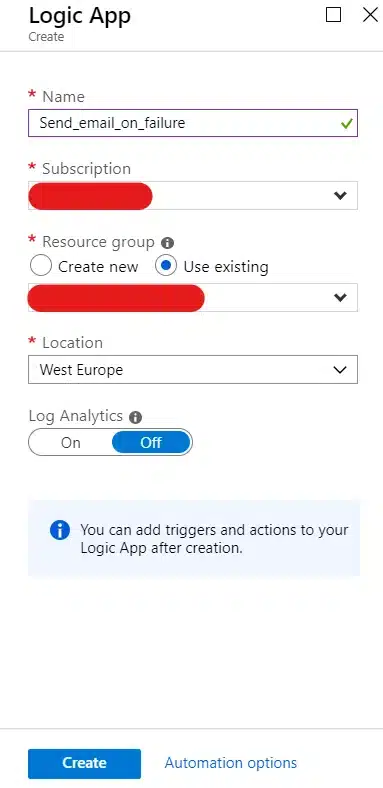
First, we need to create a new Logic App. Click “Create a resource” on the left corner of your Azure Portal. Next search for “Logic App” and click “Create”.
Choose a name, subscription, resource group and location. Leave “Log Analytics” off. In this case, I will use an existing resource group, but feel free to create a new one. Click “Create” again when you fill in all required fields.
When the Logic App is deployed and ready for use you retrieve a notification where you can navigate to the Logic App. Now you’re on the overview screen of the Logic App you just created. To develop your Logic App you click “Edit” or “Logic app designer”.

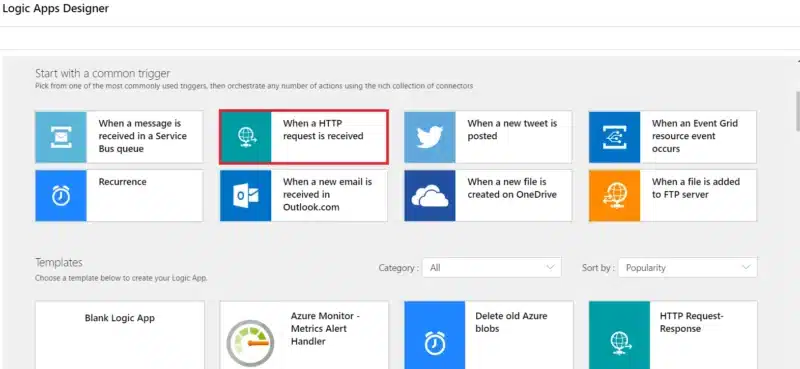
When it’s the first time you open the Logic app designer, Azure will show some templates with the common used start triggers, in our case we need the template “When a HTTP request is received”.
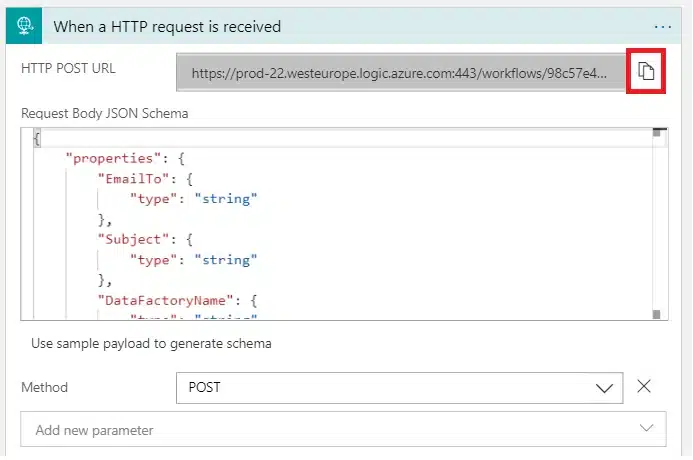
Next, you will see the following screen. Past the below JSON schema and choose “POST” for the method.
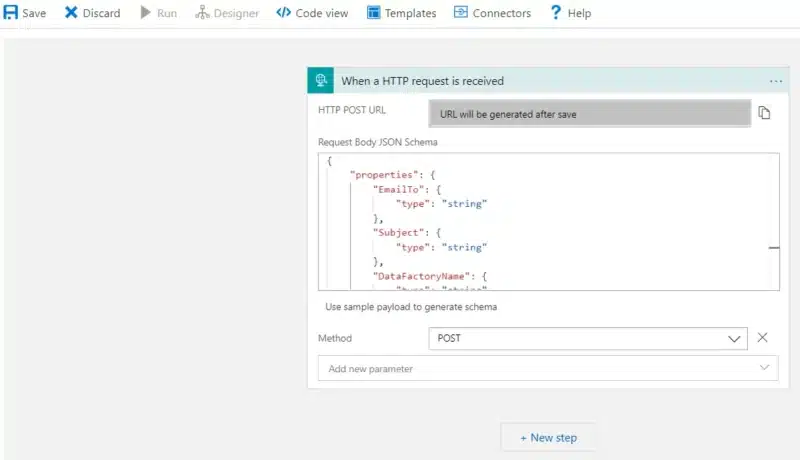
We will send the following:
{
“properties”: {
“EmailTo”: {
“type”: “string”
},
“Subject”: {
“type”: “string”
},
“DataFactoryName”: {
“type”: “string”
},
“PipelineName”: {
“type”: “string”
},
“Activity”: {
“type”: “string”
},
“ErrorMessage”: {
“type”: “string”
}
},
“type”: “object”
}
Figure 1 JSON Schema
Next, we will add a new step to our Logic App, called “Send an email”. I will use Office 365 (Outlook), but if you want to use another email provider pick that one.
It’s the first time you connect an Office 365 account on Azure? Then you need to connect your Office 365 account to Azure by signing in. (Note: allow pop-ups in your browser.)
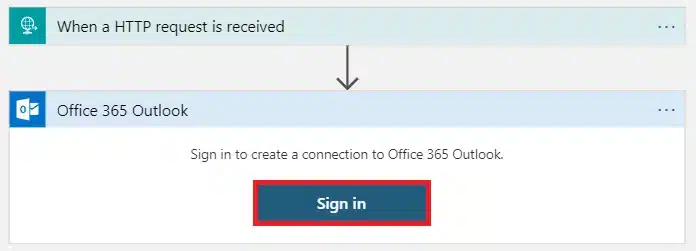
After you signed in, you’ll see the following screen.
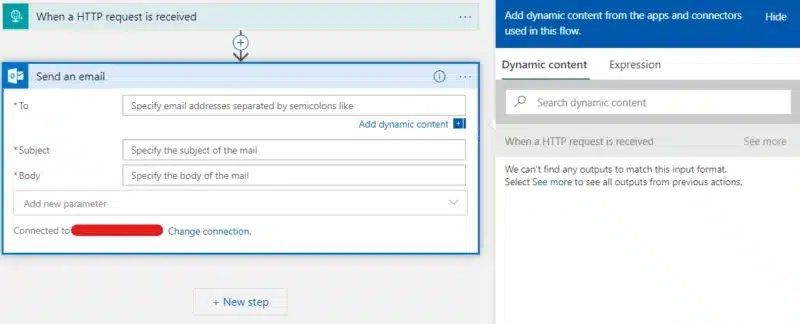
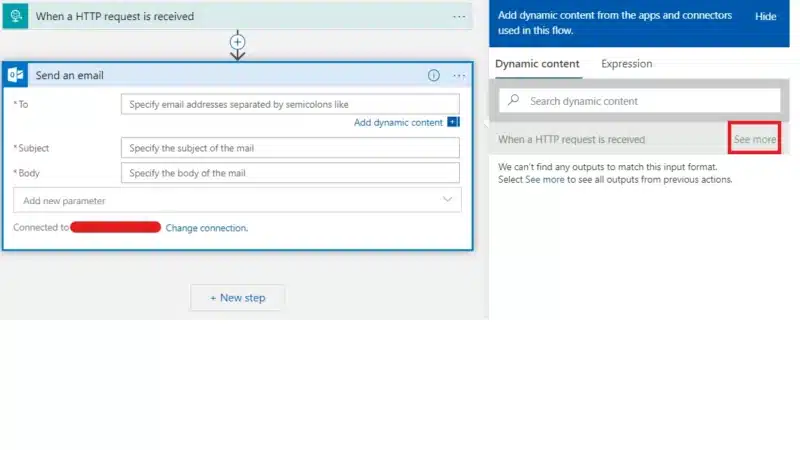
We will fill in our email dynamic based on the JSON schema we added in our start trigger. To do this you need to click “See more”. Now you see all the available variables.

Fill in the email dynamic and click “Save”.
Behind the scenes Azure created an endpoint URL for our Logic Apps, you’ll find in the first step. Copy this URL to a notepad, we’ll need this later.
Now our Logic App is ready and we’re up to move to Azure Data Factory.
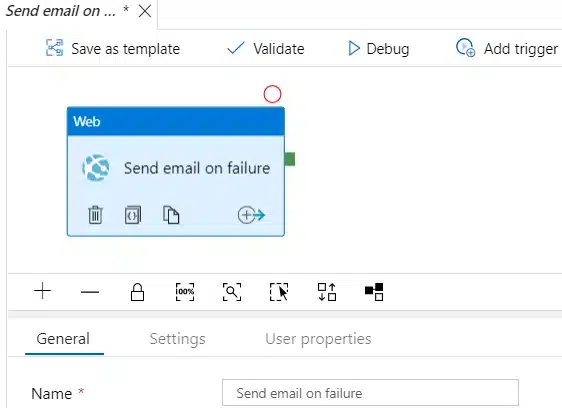
Let’s create a new pipeline, called “Send email on failure”, in Azure Data Factory. It will just have one activity, a Web activity, that will trigger our Logic App.

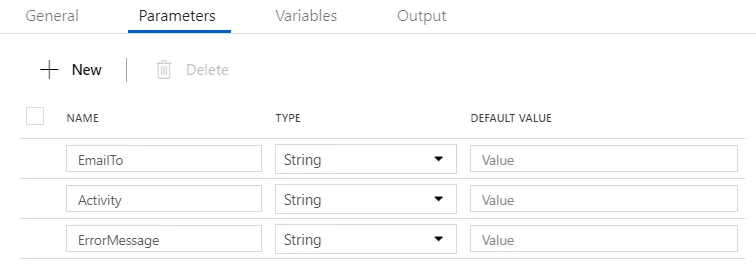
After you renamed the pipeline, add tree parameters: EmailTo, Activity and ErrorMessage. The parameters don’t need a default value.
Now add an Web activity to the pipeline and rename it.
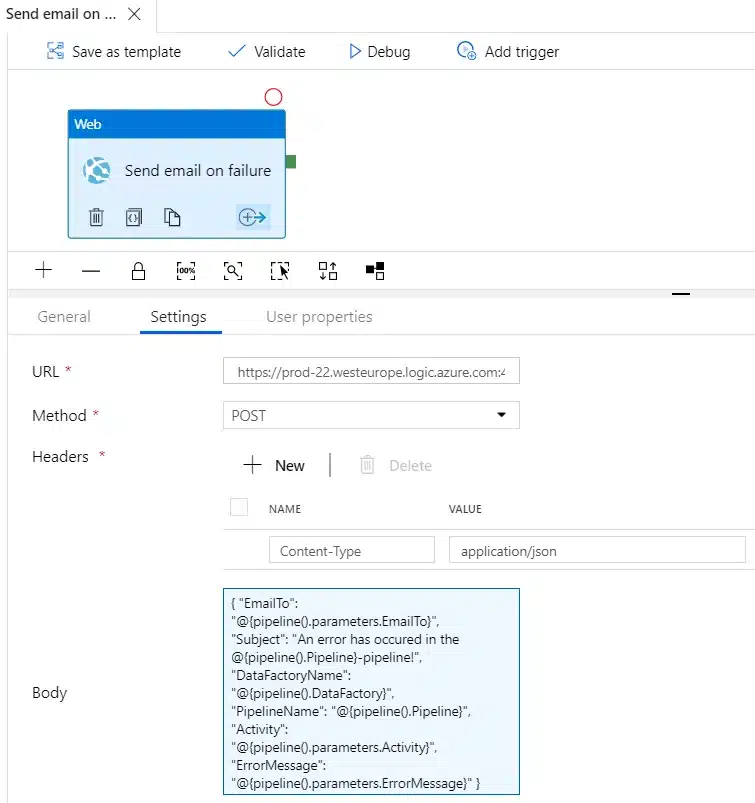
In the “Settings” tab enter the following:
2. Method
![]()
3. Headers

4. Body
{“EmailTo”: “@{pipeline().parameters.EmailTo}”,”Subject”: “An error has occured in the @{pipeline().Pipeline}-pipeline”,”DataFactoryName”: “@{pipeline().DataFactory}”,”PipelineName”: “@{pipeline().Pipeline}”,”Activity”: “@{pipeline().parameters.Activity}”,”ErrorMessage”: “@{pipeline().parameters.ErrorMessage}”}
Click “Publish all”.
Right now our Logic App can be triggered by Azure Data Factory. All we have to do now is connect this pipeline to the activities where we want to receive an email notification on failure.
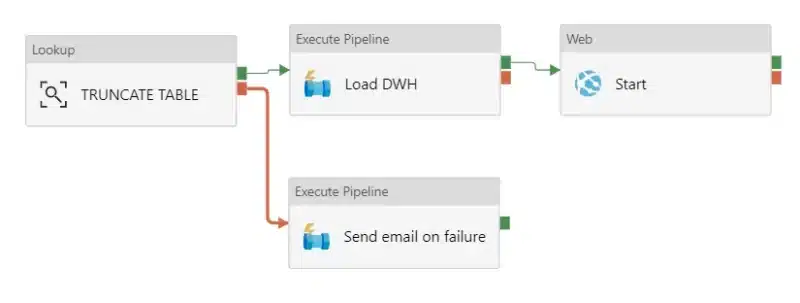
Go to a pipeline where you want to add the custom email alert, add an “Execute pipeline” activity and rename it.

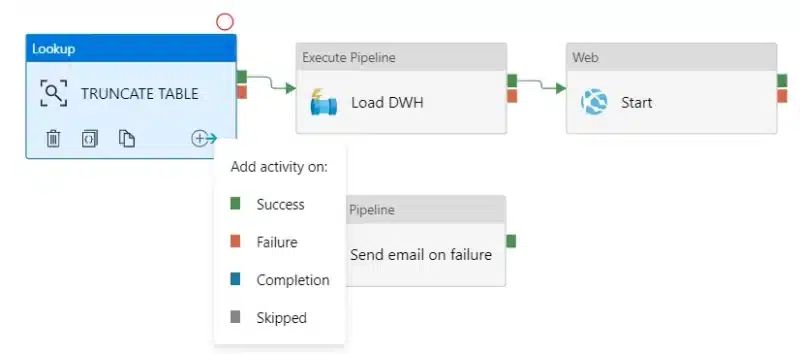
Add an activity on failure by clicking the symbol bottom right and choose “Failure”. Connect these activities and the “Send email failure” activity by dragging the red arrow.
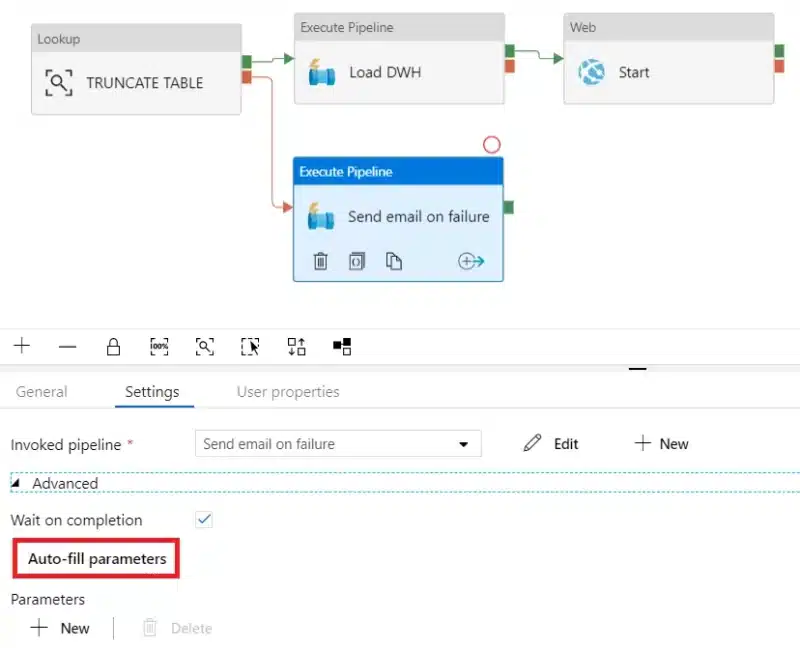
In the “Settings” tab select the “Send email failure” pipeline and expand “Advanced”. Next click “Auto-fill parameters”
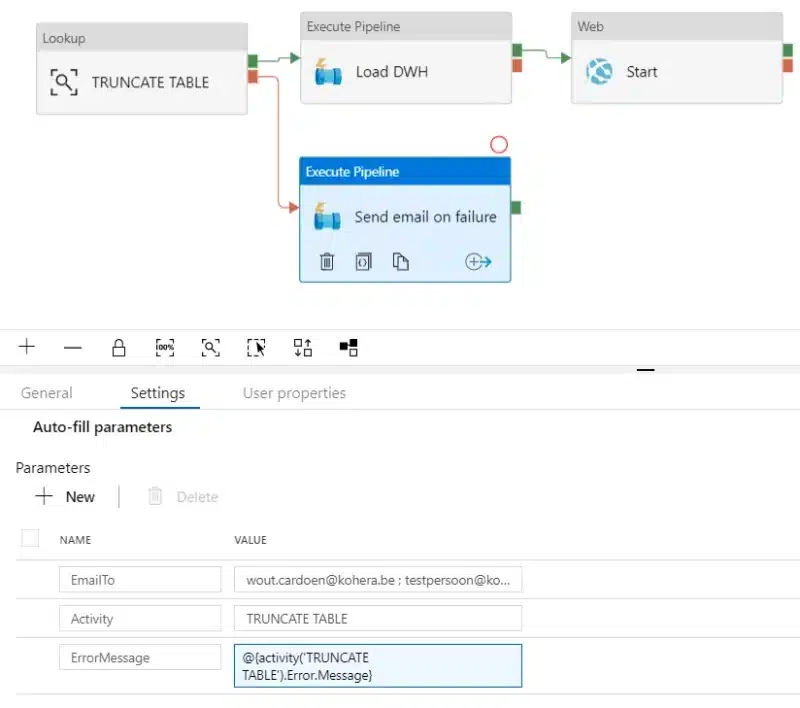
Now we need to adjust the parameters.
EmailTo = the email address of the receiver. You can set multiple email address just separate them with “;”
Activity = Write hardcored the name of the activity
ErrorMessage = @{activity(‘ActivityName’).Error.Message}
Now our solution is ready, click “Publish All” and your custom email notification is up and running. Not that hard, right? #shareyourknowledgeboostourpower.
Good to know!
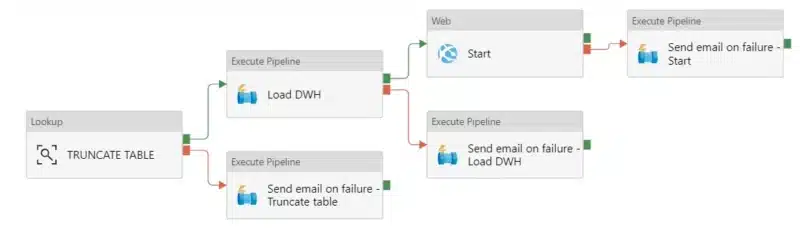
Can I now connect several activities to on, as shown in the image below?
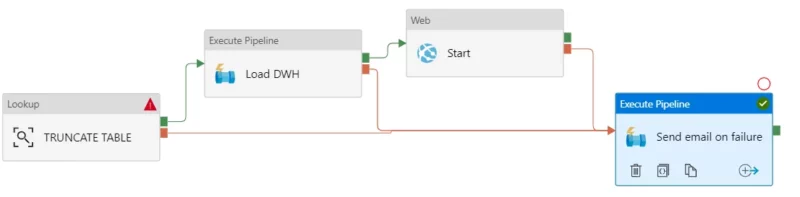
No, you can’t… Why not? Because Azure Data Factory uses the AND constraint. This means that the connected activity – “Send email on failure” – only can be executed when all the connected activities fail and that’s … IMPOSSIBLE. The only way to solve this is by linking every activity to his own “Send email on failure” activity. Like the below example.
You can easily copy and paste the “Send email on failure” activity by right-clicking the activity. Notice that you’ll need to change the parameters for each activity.
Activity = Write hardcore the name of the activity
ErrorMessage = @{activity(‘ActivityName’).Error.Message}